


Veeam Backup & Replication Best Practice Guide
Azure Integration
Veeam Compute Account
A compute account is required if you wish to restore backups to Azure as well as to deploy and manage Veeam Cloud Appliances or Cloud Machines (i.e., Azure VMs running Veeam Agents managed via Protection Groups of type “Cloud Machines”).
You can either create the Azure App Registration manually or have VBR create it for you.
NOTE: VBR will use a secret for the EntraID Application by default. If you wish to use a certificate you will need to create the EntraID Application manually.
Automatic Creation
In VBR the term “Account” is used, which has a dual meaning:
- The User Account that is used to connect and create the EntraID Application
- The EntraID Application being created
For the usage of the wizard to automatically create the EntraID Application registration the Help Center documentation states :
If you use a new Microsoft Entra ID (formerly Azure Active Directory) application (select the Create a new account option at the Subscription step of the wizard) when adding a Microsoft Azure Compute account, the Microsoft Entra ID user account where the Microsoft Entra ID application will be created must have the following privileges:
- To register applications. For this, you can assign the Global Administrator privileges to the user or enable the Users can register applications option for the user in Azure portal.
- To assign a role on the subscription level for the registered application. For this, you can use the Owner role or if the Owner role cannot be used, you can create a custom role with minimal permissions.
NOTE: if you use the “Users can register applications” setting enabled or the account has Global Admin, but the account does not have either the owner role or the custom role, the application will be created but the role assignment will fail. This will result in the account not being able to be used for any Veeam operations.
You will also see an error pop up in the VBR console:
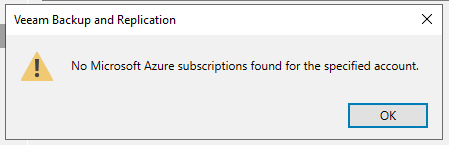
You will need to remove the account, add the Owner role or custom role, and then re-add the account.
To enable “Users can register applications” globally you can find this setting here in EntraID: EntraID > Manage -> User Settings > Users can register application toggle.
Custom Role Creation and Assignment
As the documentation states you can also create a custom role with minimal permissions if you do not wish to use the Owner role. However, this still assigns the Contributor and Key Vault Crypto User roles to the EntraID Application.
If that is not acceptable you will need to create an EntraID Application manually (see below).
The specific permissions for the custom role are:
'Microsoft.Authorization/roleDefinitions/read'
'Microsoft.Authorization/roleAssignments/read'
'Microsoft.Authorization/roleAssignments/write'
For details and a JSON statement see the Permissions for Azure Compute Account (New Application) page.
To create the custom role you can use the Azure Portal, Azure CLI, PowerShell or Bicep. You can find an example for each further down below.
Using an Existing EntraID Application
The Help Center Documentation states:
If you plan to add an Azure Compute account using an existing Microsoft Entra ID (formerly Azure Active Directory) application (select the Use the existing account option at the Access Type step of the wizard), and you do not want to use built-in Azure roles, you can create a custom role with granular permissions.
Unlike the New Application flow above you are not assigning the permissions to the user account, but directly to the EntraID Application.
In this case you need to:
- Create the EntraID Application
- Options:
- Assign the Azure Contributor role and Key Vault Crypto User role to the EntraID Application
- Create a custom role with minimal permissions and assign it to the EntraID Application along with the Key Vault Crypto User role
NOTE: it is recommended to use a Certificate instead of a secret for the EntraID Application due to the higher security of certificates.
The custom role requires all the permissions as stated in the JSON here:
Permissions for Azure Compute Account (Existing Application)
To create the custom role you can use the Azure Portal, Azure CLI, PowerShell or Bicep. You can find an example for each further down below.
Veeam Storage Account
Azure storage accounts are required for both the Archive Tier and the Restore to Azure functionality.
Unlike compute accounts veeam storage accounts are linked to the specific Azure Storage Account via the access key and secret key. Note that Shared Access Signatures are not supported.
However, as Archive Tier requires additional permissions to be granted outside of accessing the storage, an EntraID application is required. Though not stated in the documentation, you can use the same process as the Veeam Compute Account for a new EntraID Application.
However, if you wish to create a custom role for this you can use the following permissions:
Archive Storage Account Permissions
Again, following the same process above for an existing EntraID Application.
Deployment / Integration of Veeam Backup for Azure
The Service Account Permissions, including JSON statements, to create, connect and manage Backup Appliances in Azure can be found here: Service Account Permissions
You can follow the same procedure to create a custom role as described above.
Cloud Machines
Cloud machines backups allow for the backup of Azure VMs to Azure Blob Storage without the need for a network or proxy.
If you wish to create a new account can either use the same process as the Veeam Compute Account above.
Alteratively you can create a custom role for an existing EntraID Application which is similar to the Use Existing EntraID Application process, but with the following EntraID Application permissions:
Deploying Veeam Backup for Azure via Veeam Backup and Replication
The deployment of the latest Veeam Backup for Azure appliance can be done out of Veeam Backup & Replication. The Azure Marketplace only offers the deployment of the older version 6 and will not be updated anymore.
Please see Deploying Backup Appliance in the Helpcenter for instructions.
Using a VPN or ExpressRoute
It is possible to use a VPN or ExpressRoute for both restore to Azure, Cloud Machines, and Capacity/Archive Tier. Keep in mind that it increases the costs and complexity of the solution. However if it is required, please see the following KB articles:
Restore to Azure
Offloading to Azure Blob
Private deployments
If a private deployment is in place, you need to make sure that Veeam Backup & Replication components can access the Storage Accounts used as Repositories.
To achieve this, it is necessary to create Azure Private Endpoints in a VNET reachable by the Veeam Backup & Replication Server and the Gateway Server if one is in place. Additionally private DNS lookup of the Storage Accounts needs to be working for these Veeam systems.
Custom Role Creation Examples
Depending on the role to create, use the related JSON statement and role name:
- Permissions for Azure Compute Account (Existing Application)
- Permissions for Azure Compute Account (New Application)
- Azure Archive Object Storage Permissions
- Plugin Service Account Permissions
In the following examples the Permissions for Azure Compute Account (New Application) are being used.
Azure Portal
To assign the Owner Role or Assign the custom role to the User you can use the Azure Portal, see the follow this guide: Azure RBAC Role Assignment
Azure CLI
For Azure CLI to create the Role use:
az role definition create --role-definition "@yourfile.json"
To assign the role to the subscription use:
az role assignment create --assignee "<User or Group ID>" --role "Veeam Register Azure Compute Account using new Microsoft Entra application" --scope /subscriptions/00000000-0000-0000-0000-000000000000
Powershell
Use Powershell to create the role with:
$roleDefinition = Get-Content -Raw -Path "yourfile.json" | ConvertFrom-Json New-AzRoleDefinition -InputObject $roleDefinition
To assign the role use:
New-AzRoleAssignment -SignInName you@yourdomain.com `
  -RoleDefinitionName "Veeam Register Azure Compute Account using new Microsoft Entra applicatio" `
  -Scope $subScope
Bicep
ARM can be used but tends to be more verbose.
Using Bicep allows for the role to be created programmatically allowing for repeatable deployments and tracking of changes via tools such as Git.
Bicep example, VBR New Application:
targetScope = 'subscription'

@description('VBR Actions')
param actions array = [
  'Microsoft.Authorization/roleDefinitions/read'
  'Microsoft.Authorization/roleAssignments/read'
  'Microsoft.Authorization/roleAssignments/write'
]

@description('VBR not Actions')
param notActions array = []

@description('VBR Data Actions')
param dataActions array = []

@description('Veeam Register Azure Compute Account using new EntraID application')
param roleName string = 'VBR Azure User Role'

@description('Permissions needed to add an Azure Compute Account based on new EntraID application')
param roleDescription string = 'VBR Azure User Role'

var roleDefName = guid(subscription().id, string(actions), string(notActions))

resource roleDef 'Microsoft.Authorization/roleDefinitions@2022-04-01' = {
  name: roleDefName
  properties: {
    roleName: roleName
    description: roleDescription
    type: 'customRole'
    permissions: [
      {
        actions: actions
        notActions: notActions
        dataActions: dataActions
      }
    ]

    assignableScopes: [
      subscription().id
    ]
  }
}
References
Veeam:
Permissions for Azure Compute Account (Existing Application)
Permissions for Azure Compute Account (New Application)
Permissions for Azure Stack Hub Compute Account (New Application)
Permissions for Azure Stack Hub Compute Account (Existing Application)
Azure Archive Object Storage Permissions
Plugin Service Account Permissions
Permissions for Backup of Cloud Machines
KB - Restore to Microsoft Azure with ExpressRoute or site-to-site VPN
KB - Connect to an Object Storage Repository via Azure Blob Private Endpoints
Azure:
Azure Owner Role
Azure Contributor Role
Azure Key Vault Crypto User Role
Azure RBAC Role Assignment
Azure RBAC Role Assignment - Grant Access Powershell
Bicep Documentation