Veeam Service Providers Best Practice Site
The RESTful API service and the Restore Portal are tightly coupled as they are within one and the same service. Therefore you cannot separate them onto different machines.
Deploy the RESTful API service (with the Restore Portal) onto a dedicated machine instead of on the VB365 Controller:
- to add an additional layer of security
- This enables the Restore Portal to be placed in a more restrictive security zone separate from the Veeam environment. This way, a threat actor gaining access to the server doesn’t automatically compromise the Veeam environment. A load balancer or reverse proxy could also be placed in front of this server.
- decrease the load on the VB365 Controller server for the Restore Portal
- increase the performance of the service.
Custom integrations (e.g. billing and reporting) should be pointed to talk directly and only to the Controller server.
Multiple Restore Portal servers behind a load balancer is supported and can be used for limited high availability. Please note that other components, like the Controller server and its database, are still single points of failure.
Installation
The procedure to deploy the software bits of the RESTful API & Restore Portal can be found in the User Guide.
Set up the Restore Portal
Installation
The procedure to deploy the software bits of the RESTful API & Restore Portal can be found in the User Guide.
Set up the Restore Portal
Configuring the API/Portal onto a dedicated server requires several steps. It is important that these steps are followed in order:
- Prepare the certificate
- Create the Enterprise application
- Configure the VB365 API/Portal server
- (Optional) Enable restore operator authentication
- (Optional) Enable integration with VSPC
- Steps to perform in the Customer’s Microsoft 365 tenant
Sizing
| VB365 API/Portal | ||
|---|---|---|
| OS | Windows | |
| CPU | 8 Cores | Minimum. Additional CPU improves restore and search performance. |
| RAM | 16 GB | Additional RAM improves restore and search performance. |
| Disk | 100 GB | OS + software installation + logs. |
1. Prepare the certificate
1.1 Create a self-signed certificate (on the VB365 Controller)
This step can be executed on any Windows machine, but to limit the amount of steps, run the script below on the VB365 Controller.
As we will use a dedicated server for the Restore Portal, we need to create a self-signed certificate that will be used in the following places:
- VB365 Controller
- VB365 API/Portal server
- Microsoft Entra ID Enterprise application
The thumbprint of the certificate will be used as a kind of token to permit communication between these components. For this use case, a self-signed certificate is perfectly fine. Additionally, the expiration date by default is 10 years, meaning it does not need to be replaced every now and then.
Logon to the VB365 Controller and run the following PowerShell script to create a new self-signed certificate, imports it to the Trusted Root Certificates authority, and exports it so you can copy it to the VB365 API/Portal server:
# Set new certificate details
$name = Read-Host "Set cert friendly name"
$securestring = Read-Host "Set cert password" -AsSecureString  # Always secure private key with password
$cn = ([System.Net.Dns]::GetHostByName($env:computerName)).HostName  # FQDN of server

# Create the certificate
$cert = New-SelfSignedCertificate -Type Custom -KeyExportPolicy Exportable -KeyUsage None -KeyAlgorithm RSA -KeyLength 2048 -HashAlgorithm SHA1 -NotAfter (Get-Date).AddYears(10) -Subject "CN=$cn" -FriendlyName $name

# Export the certificate
Export-PfxCertificate -Cert $cert -FilePath "vb365-restore-portal.pfx" -Password $securestring | Out-Null

# Import the certificate into Trusted Root Certification Authorities
Import-PfxCertificate -FilePath "vb365-restore-portal.pfx" -Password $securestring -CertStoreLocation "Cert:\LocalMachine\Root" -Exportable | Out-Null

Write-Host "Certificate location: $((Get-Item "vb365-restore-portal.pfx").FullName)" -ForegroundColor Green
Extremely important: The certificate must be exported with private keys, otherwise the restore portal will not work!
1.2 Import the certificate (on the VB365 API/Portal server)
Copy the created .PFX certificate from the VB365 Controller to the VB365 API/Portal server.
Import the certificate:
- Open the Certificates MMC
- Go to Trusted Root Certification Authorities -> Certificates
- Import the PFX certificate
The result should look like this:

Important The result should look like the screenshot above on both VB365 Controller and VB365 API/Portal server.
2. Create the Enterprise application
2.1 Create the Enterprise application
To set up the Restore Portal we need to create an Enterprise application in Microsoft Entra ID with the correct permission.
There are several ways of creating this application:
- Automatic (Recommended), by adding your own service provider Microsoft 365 tenant to the backup server via the wizard. This will create the Microsoft Entra ID application, allow us to import the self-signed .PFX certificate and set up the required permissions.
- Manual, by going into Microsoft Entra ID and manually perform the setup. Please check out this Veeam blog post on how to manually perform the setup.
-
External scripts, by using a collection of scripts to automate the setup and configuration of the Restore Portal. Examples of such scripts are available on our VeeamHub.
Please always carefully inspect each of the scripts and carefully test in a non-production environment.
Important: Take note of the Application ID as it is needed to set up the dedicated VB365 API/Portal server as well as each customer’s Microsoft 365 tenant.
2.2 Retrieve the Application ID
There are two ways of retrieving the Application ID:
-
Option 1: via VB365 Controller -> Options -> Restore Portal
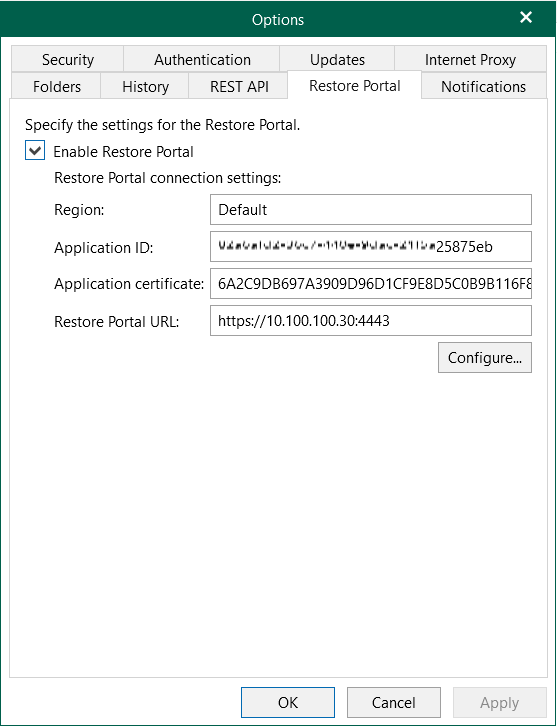
-
Option 2: via Microsoft Entra ID -> Manage -> Enterprise applications
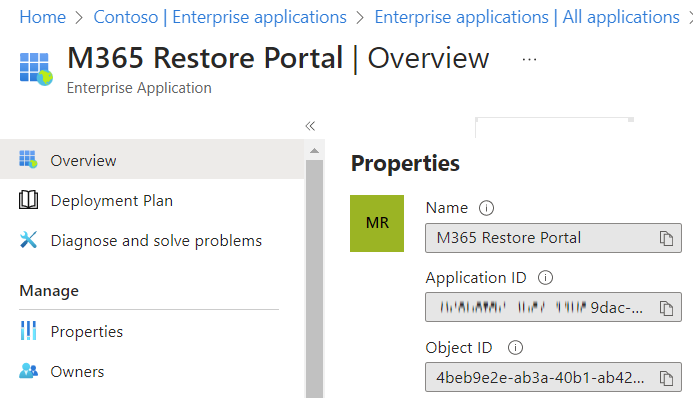
2.3 Verify the certificate
-
Go to Microsoft Entra ID -> Manage -> App registrations -> All applications
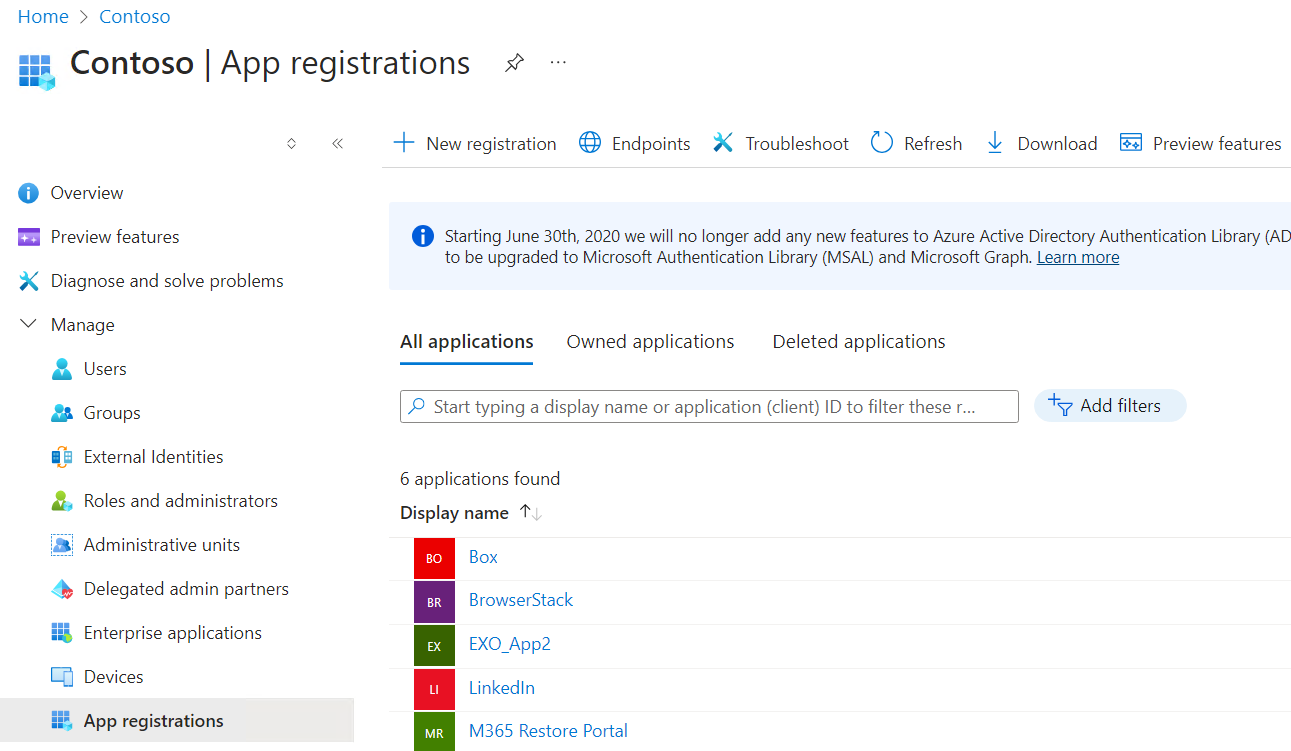
-
Click on the App registration -> Manage -> Certificates & secrets and verify the thumbprint of the certificate matches with the earlier created certificate.
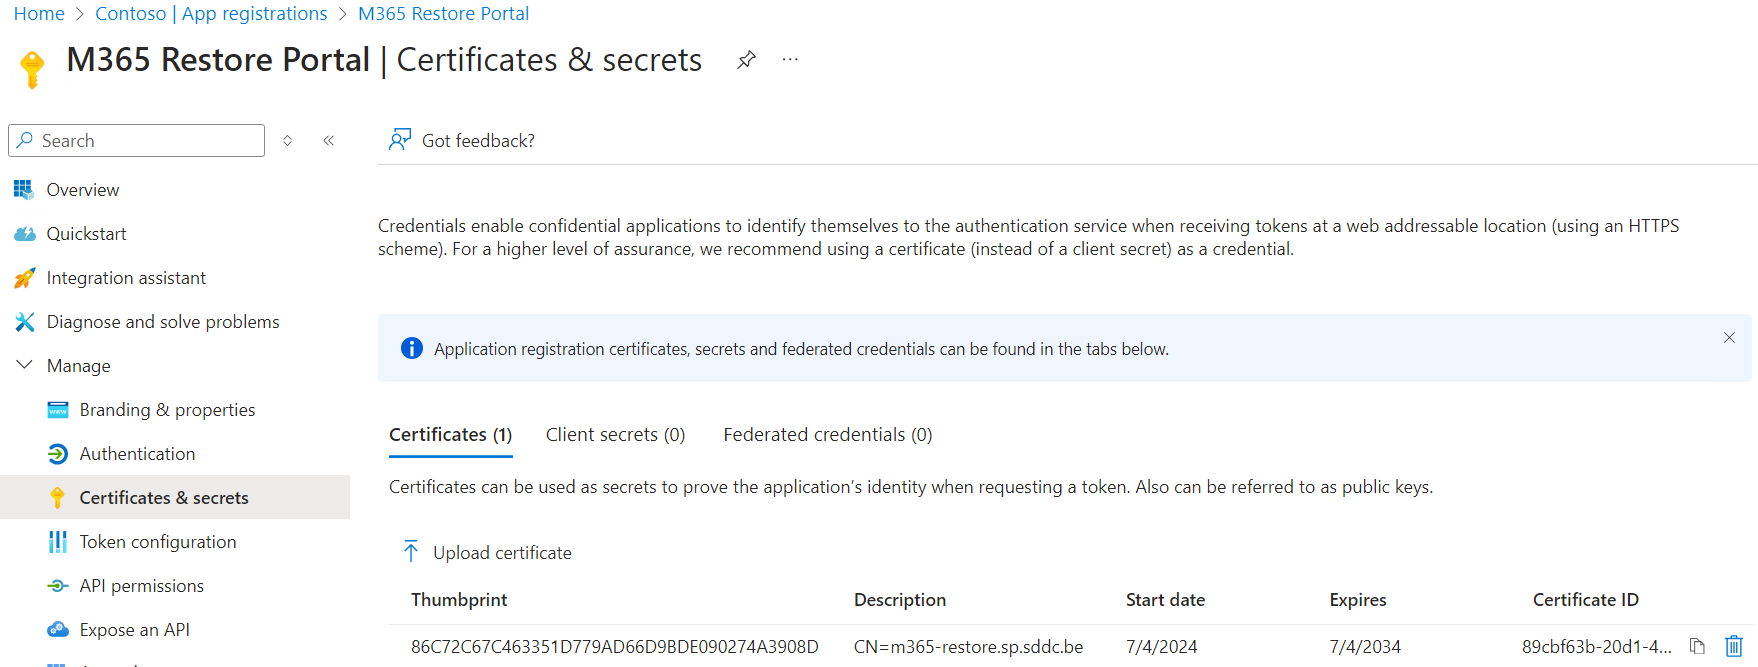
3. Configure the VB365 API/Portal server
- Open C:\Program Files\Veeam\Backup365\Veeam.Archiver.REST.Configurator.exe
-
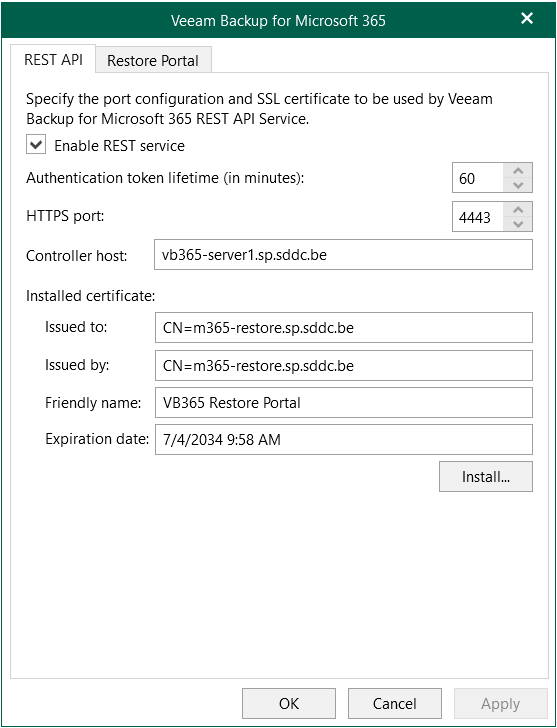
On the REST API tab:
- Enable REST service
- Set the controller host (=VB365 Controller)
- Install the certificate
- (new in v8) Uncheck Enable Swagger UI to disable usage and access to the Swagger UI website.
- (new in v8) Check Enable restore operator authentication only to use the REST API only for authentication of restore operators to the Restore Portal. This means all other REST API endpoints will be unavailable. For access to other REST API endpoints, talk directly to the VB365 controller.
- Apply
-
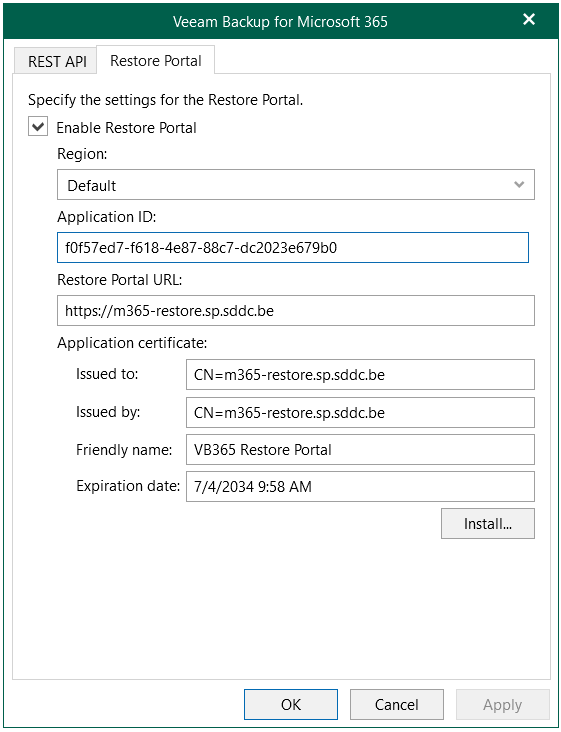
On the Restore Portal tab:
- Enable Restore Portal
- Set the Application ID
- Set the Restore Portal URL
- Install the self-signed PFX certificate
- Apply
4. (Optional) Enable restore operator authentication
This step is optional and only required when you want to enable Restore Operators:
In some cases, the tenant can prefer to delegate restore operations on behalf of users or groups to Restore Operators, such as: - IT administrator at the client - Service Desk at the service provider
It is important to know that the restore operator can never access any of the data. They can only perform restore to the original location and for the scope they have access to.
On the VB365 Controller:
-
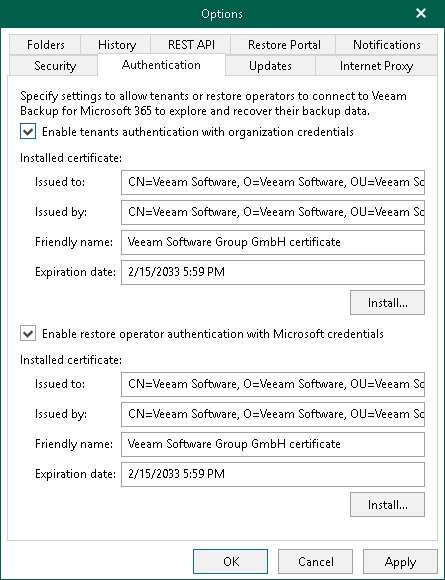
Go to Options -> Authentication
- Enable restore operator authentication with Microsoft credentials
- Install the self-signed PFX certificate
- Apply
-
Add the restore operator(s) and configure the scope.
5. (Optional) Enable integration with VSPC
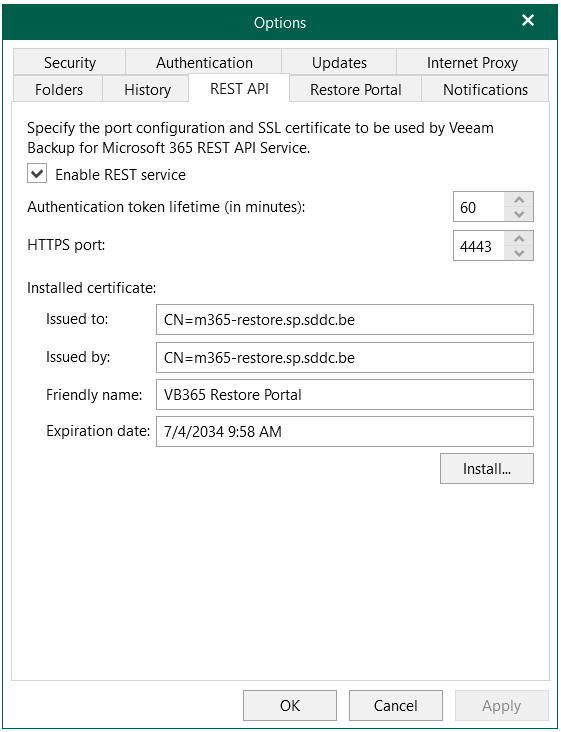
When integrating VB365 with VSPC, make sure that the REST API service is enabled on the VB365 Controller. The VSPC will always directly connect to the VB365 Controller over this port (4443).
On the VB365 Controller:
-
Go to Options -> REST API
- Enable REST service
- Install the self-signed certificate
- (new in v8) Leave Enable Swagger UI checked to enable usage and access to the Swagger UI website for internal use.
- (new in v8) Leave Enable restore operator authentication only unchecked so that all REST API endpoints are available when communication directly with the VB365 controller.
- Apply
6. Steps to perform in the Customer’s Microsoft 365 tenant
Once the Restore Portal is set up, tenants can be given access to perform restore operations. However, before any tenant can do this, each tenant is required to add the Restore Portal Enterprise Application to their Azure AD.
- Run the New-AzureADServicePrincipal PowerShell cmdlet to make the Restore Portal’s Application ID show up in the list of Integrated Applications in the Admin Portal of your customer’s Microsoft 365 organisation. Use the tenant admin credentials.
  # Script example

  # Install the required PowerShell module
  Install-Module AzureAD

  # Authenticate to Azure
  Connect-AzureAD

  # Add the Enterprise application
  New-AzureADServicePrincipal -AppId "00000000-0000-0000-0000-000000000000" # Replace with your Application ID
-
Go to the Azure portal and sign into the tenant organisation.
-
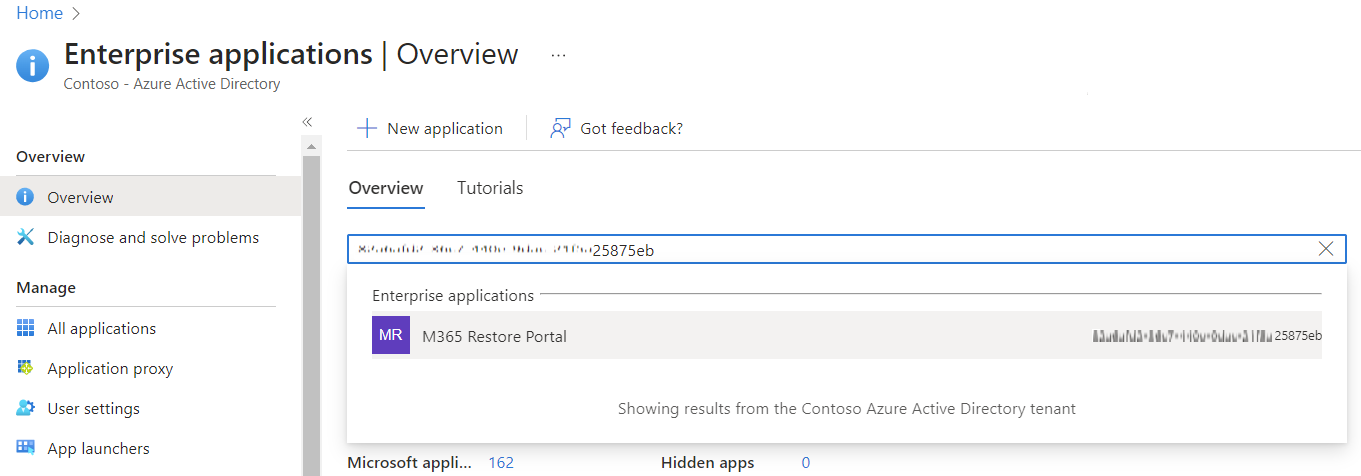
Go to Microsoft Entra ID -> Enterprise applications -> Overview
-
Enter the Application ID from step 1 into the search your tenant field -> Click it to open the Enterprise application.
-
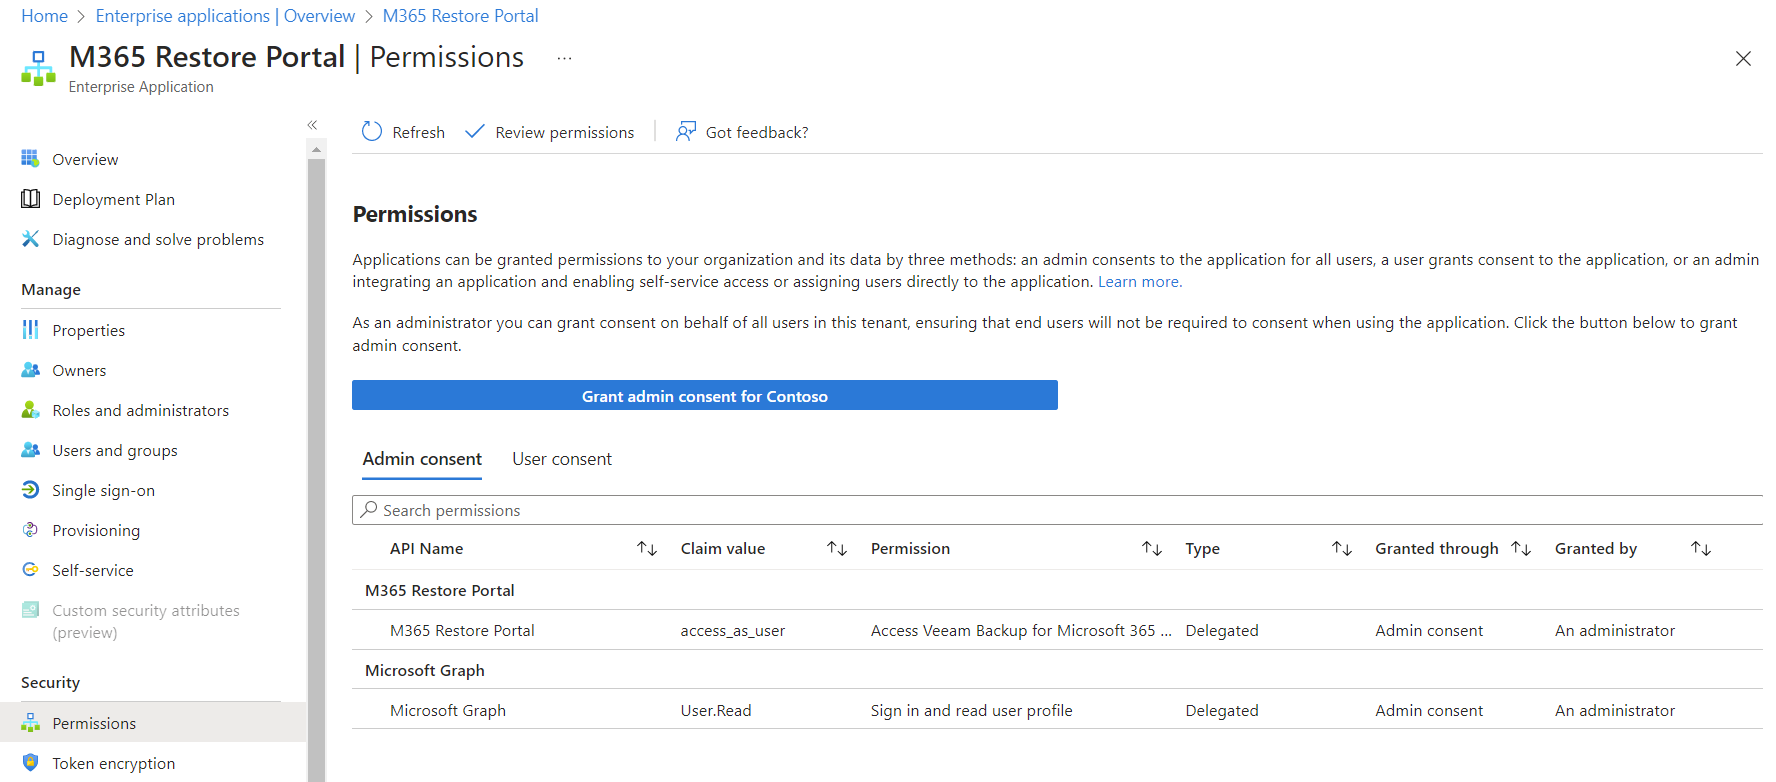
Go to Security -> Permissions -> Click on the blue bar *Grant admin consent for ….
-
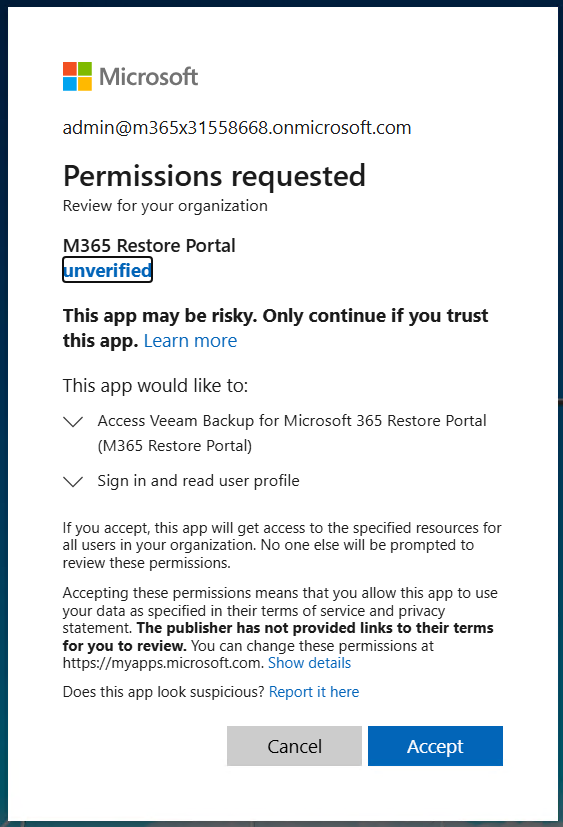
A new window will open to login -> Accept the permissions
Access the Restore Portal
At this moment, the customer’s users can log on to the Restore Portal and browse their backup data for restore.
